This video and article are part of Cooking 101, our series on kitchen fundamentals. Every episode covers a different technique, with tips and recipes from guest hosts who are experts to set you up for success.

Credit…Adam Centrella
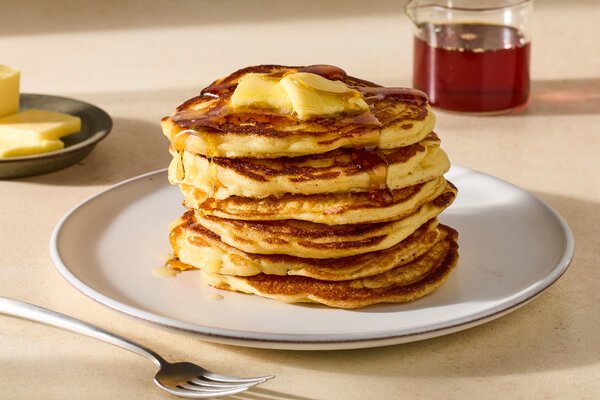
A golden stack of pancakes, slicked with butter, dripping with syrup, is one of the most rewarding breakfasts you can cook on a weekend — a perfect way to start the day. But not all pancakes reach those burnished heights. Some are flat; some are pale and spongy; some burn on the outside and stay raw in the middle.
The secret to consistently perfect pancakes lies in a few simple but crucial moves. And sometimes the biggest mistakes are not the things you did, but the things you didn’t do. Here are a primary culprit, and a few others to consider:
You’re not resting your batter

Pancakes made with an unrested batter.Credit…Julia Gartland for The New York Times. Food Stylist: Monica Pierini.

Pancakes made with a batter that has been rested for 10 minutes.Credit…Julia Gartland for The New York Times. Food Stylist: Monica Pierini.
You know the old chestnut that the first pancake you fry is for the dog? That’s because if you haven’t let the batter rest, those first few pancakes will turn out too thin, with the batter running all over the pan. Letting the batter rest fixes this, giving the flour time to hydrate and the batter a chance to thicken. It also lets the leaveners (baking soda and baking powder) fully dissolve and disperse, so you get an even rise.
The sweet spot is 10 to 30 minutes on the counter, but the batter will keep in the fridge for up to 48 hours. A longer rest actually deepens the flavor: The buttermilk has more time to work on the flour, yielding something slightly more complex. Pancakes made from an overnight batter won’t rise as much. If you know you’re going to keep the batter overnight, you can wait to add the leavener until just before frying, which helps with the rise. (The batter will be very thick by morning — that’s fine, don’t thin it out — and need a touch more time in the pan to cook through.)

Pancakes made from an unrested batter.Credit…Julia Gartland for The New York Times. Food Stylist: Monica Pierini.

Pancakes made from batter that’s been rested for 10 minutes.Credit…Julia Gartland for The New York Times. Food Stylist: Monica Pierini.
One more thing to note: Lumps are not only OK; they’re expected. The goal when mixing is to combine the wet and dry ingredients until there are no streaks of dry flour — that’s it. A lumpy batter is a properly mixed batter. Those lumps will hydrate and smooth out as the batter rests. Overmixed batter, on the other hand, develops too much gluten, and the result is a flat, dense, rubbery pancake that no amount of syrup can save.
If your batter is rested but still isn’t yielding a fluffy result, you may want to consider these popular pitfalls:
You’re not using an acid (like buttermilk)

Buttermilk adds a gentle tang and the right texture, but thinned plain yogurt, sour cream or kefir also work.Credit…Julia Gartland for The New York Times. Food Stylist: Monica Pierini.
A great pancake batter is a chemistry equation: Acid (buttermilk, lemon juice or vinegar) plus a base (baking soda) equals lift. When baking soda comes into contact with an acidic ingredient, it produces carbon dioxide bubbles. Those bubbles are what make your pancakes light and fluffy. Without acid in the batter, the baking soda is inert, and you’re left wondering why your pancakes came out dense.
The best source of that acid is a liquid like buttermilk, which adds a gentle tang and the right texture to make a nicely pourable batter. If buttermilk isn’t in your fridge, you have more options. Plain yogurt, sour cream or kefir also contain the right acidity — just thin them with regular milk or water so the batter stays pourable. Or use this classic trick: Stir a tablespoon of lemon juice or white vinegar into a cup of whole milk, let it sit for five minutes, and you’ve got a reasonable stand-in.
If you have any buttermilk left over, freeze it. It will lose a little potency over time, but it still works fine for your next batch.
And yes, you can make pancakes with water instead of milk. But don’t. The fat and protein in milk (and also, the butter and the eggs) is part of what makes a pancake a pancake. If you’re cooking for someone who can’t have dairy or eggs, use a dedicated vegan pancake recipe rather than trying to substitute your way through a conventional one.
Your baking soda and baking powder are old

To test your baking powder or soda, add a pinch to some lemon juice. If it bubbles vigorously, you’re in great shape.Credit…Julia Gartland for The New York Times. Food Stylist: Monica Pierini.
Most pancake recipes call for baking soda and baking powder: Each does something specific. Baking soda is the more powerful of the two, reacting with the buttermilk to produce a fast, vigorous rise and give pancakes their deep golden brown color. Baking powder has the acid already built in, activating on its own once when the liquid hits it, and again when exposed to heat (this is what “double acting” means). Together, baking soda and powder give you pancakes that are well risen, nicely bronzed and tender.
Baking powder and soda do go stale, so be sure to check the expiration date. If you’re unsure, test them to see if they’re still active. For baking soda, drop a pinch into a small amount of vinegar or lemon juice — it should bubble vigorously. For baking powder, stir a teaspoon into hot water, which should cause it to fizz. If nothing happens, consider toast and eggs for breakfast instead.
Your pan is too hot or too cold

From left, pancakes that are too light, just right and too dark.Credit…Julia Gartland for The New York Times. Food Stylist: Monica Pierini.
Pan temperature is another important variable in pancake cooking, and one that doesn’t get enough attention. Cook on a heat that’s too low, and your pancakes will be pale and doughy; too high, and the outside will scorch before the inside has a chance to set.
Start by heating your pan over medium-high heat for two to three minutes — longer if you’re using cast iron, which takes time to come up to an even temperature. Hold off on adding fat until the pan is hot enough. Here’s how to tell: Flick in a few drops of water. If they sizzle and evaporate on contact, you’re in the right range. If the drops skitter and dance around the surface, the pan is too hot. Pull it off the heat for 30 seconds before proceeding.
Once the temperature feels right, add your fat. A mix of butter and a neutral oil works best. Butter contributes flavor and browning, while oil raises the smoke point so that the butter won’t burn. For the crispiest edges, don’t be stingy. You want enough fat to swirl if you tilt the pan, not just a thin sheen. Then reduce the heat to medium and give the fat a moment to get hot before you pour in the batter.
Your first pancake is a test run. It will tell you whether your heat is right, whether your batter is the right consistency and whether you need more fat. If it comes out great, you’re a pancake master. If it doesn’t, eat it in the kitchen and adjust the heat. Be sure to add more fat between batches. And if the butter starts to blacken and smell burned, wipe out the pan with a paper towel before continuing.
Pan choice also has an impact. Cast iron, carbon steel and stainless steel all produce pancakes with crispy edges and caramelized bottoms. Nonstick is more forgiving and makes flipping easier, but the color will be paler and the edges not quite as crunchy.
You’re making them too big

Use a 1/3- to 1/2-cup dry measure or a large ice cream scoop for your batter.Credit…Julia Gartland for The New York Times. Food Stylist: Monica Pierini.
The instinct is to fry big, diner-style pancakes, the kind you’d see people waiting in line for on social media. But smaller pancakes are almost always better pancakes. A smaller pancake has more surface area relative to its interior, which means it has crispier edges and is easier to flip. Use a ⅓-cup dry measure or a large ice cream scoop to portion your batter. Be sure to space the pancakes a couple of inches apart, since they’ll spread a bit.
Once the batter is in the pan, don’t touch it. The pancakes are ready to flip when bubbles speckle the entire surface, not just the edges. Flip too early and the batter will splash and run; flip too late and you’ll get a tough, overcooked pancake. When the moment comes, use a wide, thin spatula and commit to a single clean, confident motion. Note that the second side takes roughly half as long as the first. Cook it until the bottom is golden and the pancake springs back lightly when pressed in the center.
If you want to incorporate mix-ins — blueberries, chocolate chips, sliced banana — add them to each pancake after you’ve poured the batter and given it a moment to just begin to set at the edges. Stirring them into the batter in the bowl can deflate it before you even start cooking, and this way you can vary each batch without committing to the flavors.
Follow New York Times Cooking on Instagram, Facebook, YouTube, TikTok and Pinterest. Get regular updates from New York Times Cooking, with recipe suggestions, cooking tips and shopping advice.